Openmediavault is a powerful open-source NAS (Network Attached Storage) solution that allows users to create their own file storage server without significant financial investment. In this article, we’ll explore how to acquire Openmediavault, the necessary hardware requirements, installation steps, and delve into its user-friendly interface and robust features.
Hardware Requirements
Before diving into the installation, it’s crucial to consider the hardware requirements for running Openmediavault. The system is designed to run on x86_64 architecture, which means it can be installed on a wide variety of older hardware, often making it a cost-effective solution.
Minimum Hardware Requirements
Processor:
-
A 64-bit compatible processor (Intel or AMD).
-
An old PC or server can often suffice for this purpose.
RAM: At least 1 GB of RAM is required, but 2 GB or more is recommended for better performance, especially if you plan to run multiple services.
Storage:
-
It’s important to have adequate storage for your needs. You can use old hard drives from previous systems (HDD or SSD) and USB drives as temporary storage solutions.
-
Consider installing at least one drive for the operating system (20 GB or more recommended) and additional drives for data storage.
Network Interface: A network interface card (NIC) is crucial to connect your NAS to your home or office network.
Using older hardware not only helps cut costs but also contributes to recycling and eco-friendliness. Many users might have discarded computers that can easily be repurposed to run Openmediavault, making it an ideal choice for budget-conscious individuals.
Acquiring the ISO File and Creating Bootable Media
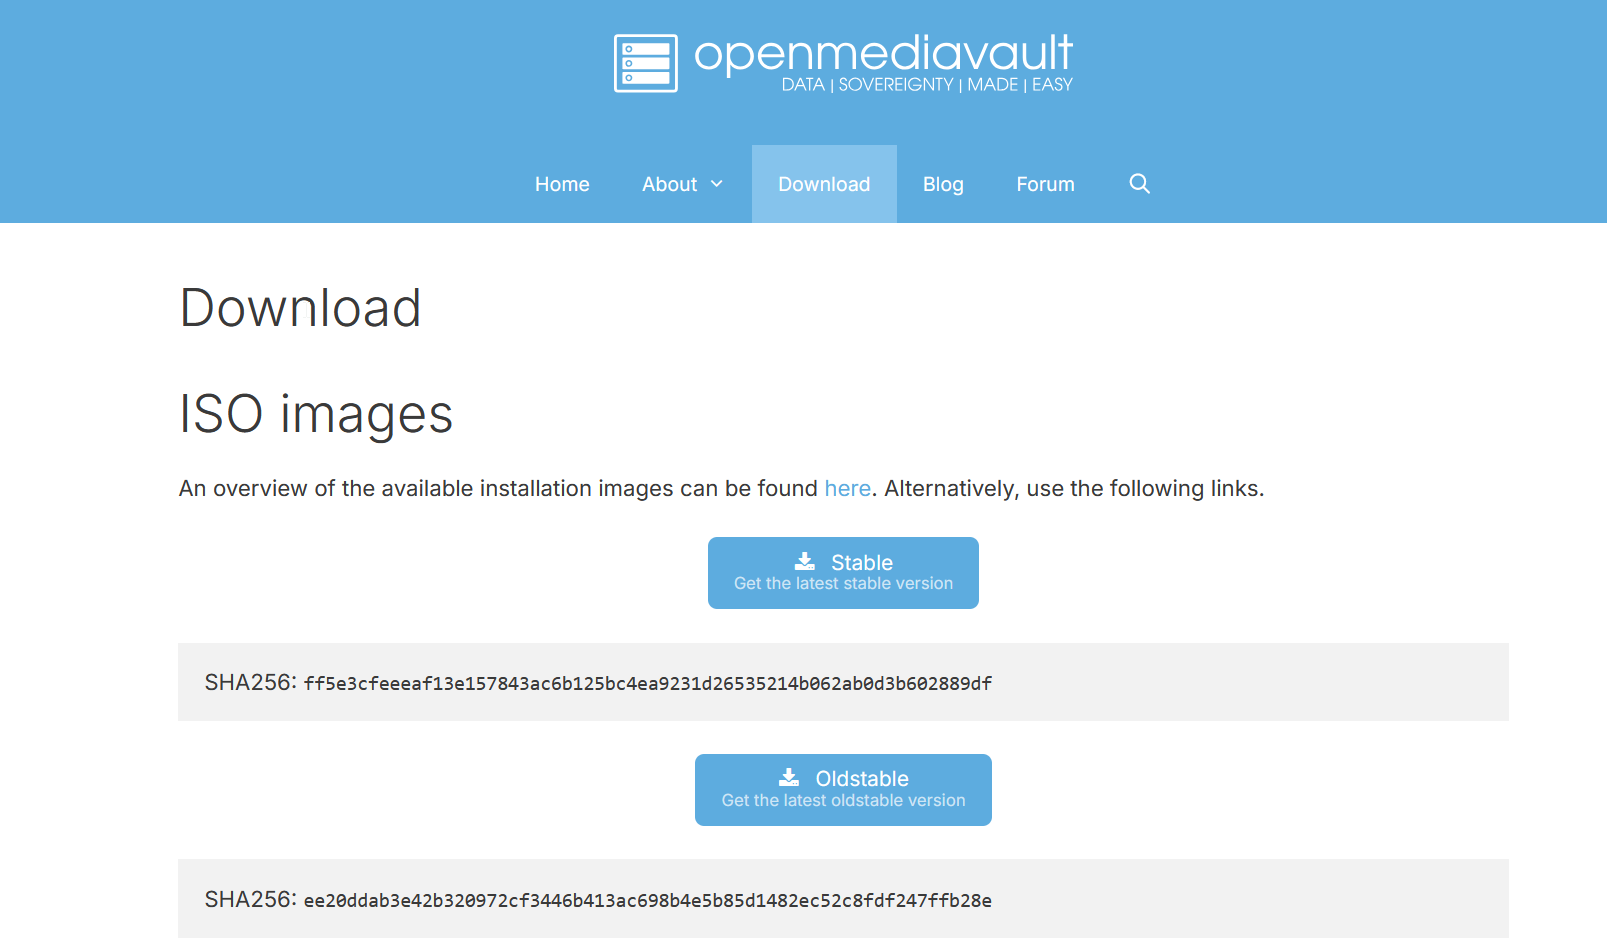
To get started with Openmediavault, the first step is to download the ISO file. Here’s how:
-
Visit the Official Website: Go to the Openmediavault download page.
-
Select the Latest Version: Click on the latest stable release link to download the ISO file.
-
Verify the Download: It's advisable to verify the integrity of the downloaded file using checksums provided on the website.
Once you have the ISO file, you need to create bootable media:
-
Choose Your Media: You can use a USB flash drive or DVD.
-
Use a Bootable USB Tool: For USB drives, tools like Rufus (for Windows) or Etcher (for macOS/Linux) can easily create bootable media.
-
Burn to DVD (Optional): If using a DVD, use software like ImgBurn to write the ISO image to the disc.
Installation Process
Once you have your bootable media ready, follow these steps to install Openmediavault:
-
Boot from the Media: Insert the bootable USB or DVD into the server or PC and restart it. You may need to change the boot order in the BIOS settings.
-
Start Installation: Upon booting, the Openmediavault installer will launch. Follow the on-screen instructions. You'll need to select:
- Language and region.
- Installation target (the drive where Openmediavault will be installed).
-
Configure Settings: During the installation, you will be asked to set up:
- Hostname (name of your server).
- Network settings (IP configuration). It’s recommended to set a static IP for reliable access later.
-
Complete the Installation: After configuration, the installation will proceed. Once finished, remove the bootable media and reboot your system.
Accessing the Interface
After installation, you can access the Openmediavault web interface:
-
Open a Web Browser: On a device connected to the same network, open a web browser.
-
Enter the Server’s IP Address: Type
http://<your_static_ip_address>in the address bar and press Enter. -
Log In: Use the default login credentials:
- Username:
admin - Password:
openmediavault
- Username:
Navigating the Features of Openmediavault
Once logged in, you’ll find a user-friendly interface that offers a multitude of features:
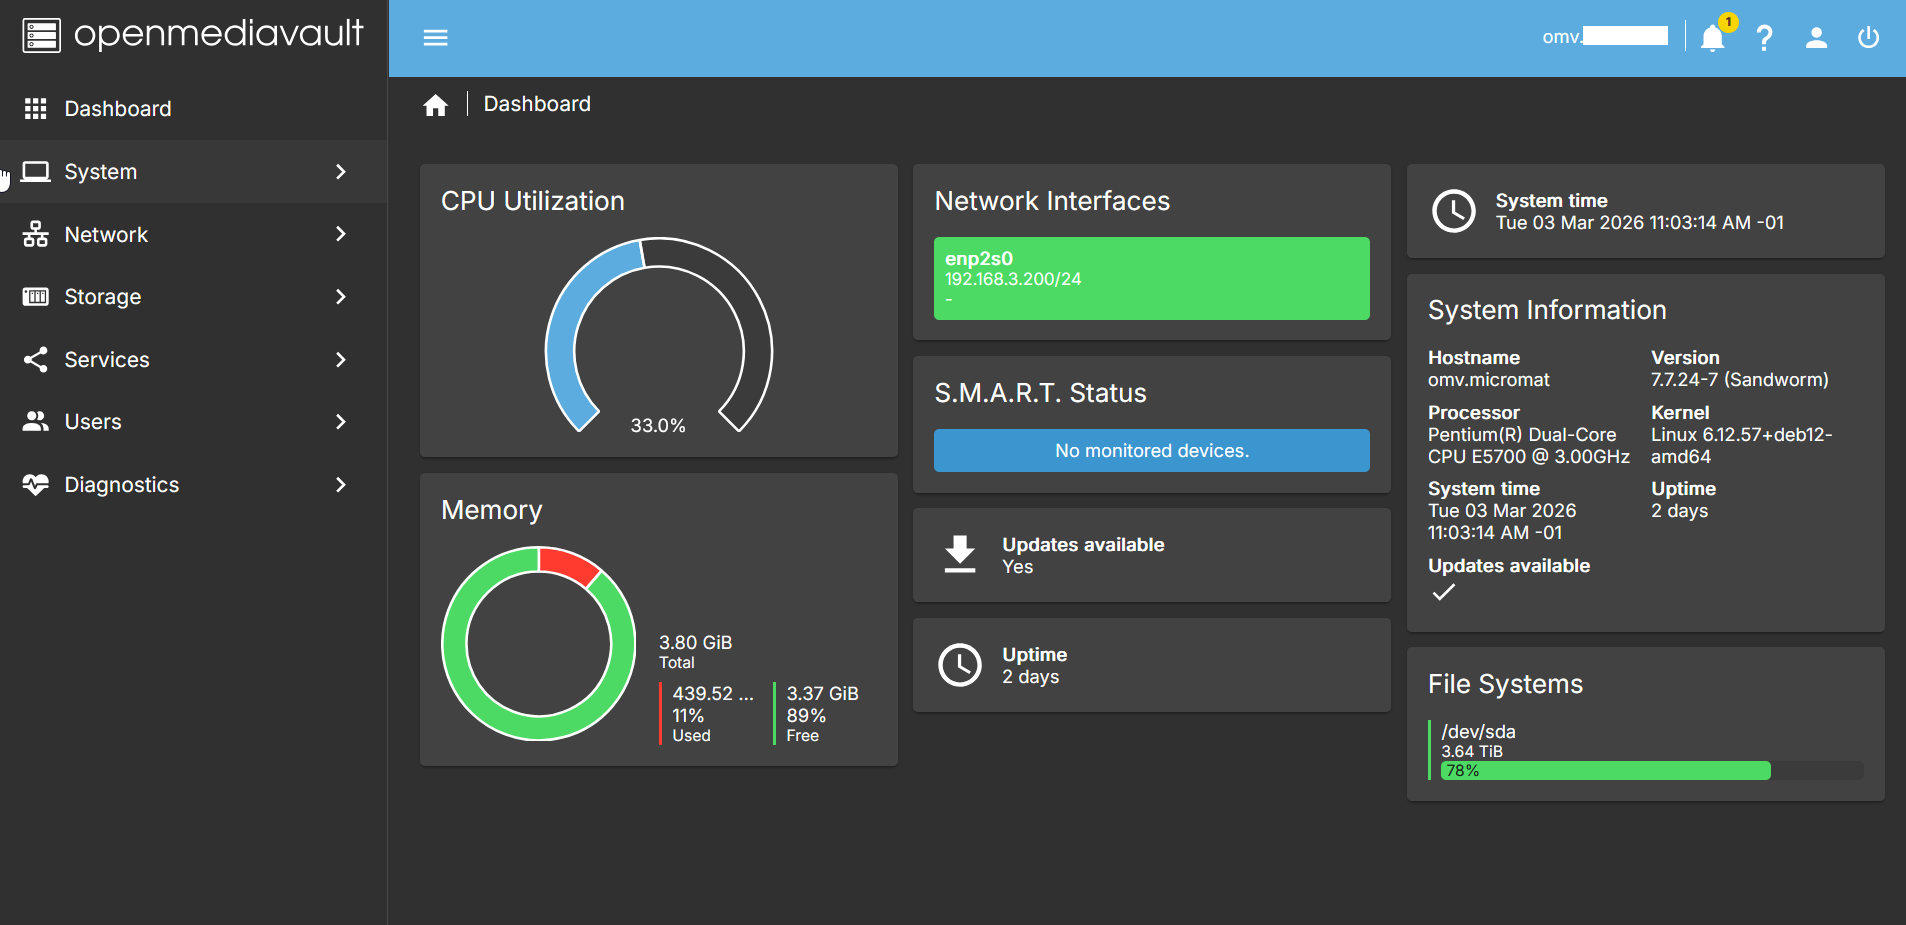
Dashboard
The dashboard provides a comprehensive overview of your system’s status, including:
-
CPU Usage: Monitor current CPU load for performance tracking.
-
RAM Utilization: Check available memory for optimal application performance.
-
Storage Capacity: View space used and remaining on attached drives.
-
Network Traffic: Insight into incoming and outgoing network data.
File Systems
This feature allows you to manage your attached storage drives effectively:
-
Creating and Deleting File Systems: Use various file systems like ext4, XFS, or BTRFS for performance or data protection.
-
Formatting Drives: Easily format drives to the desired filesystem.
-
Mounting and Unmounting Storage: Control access to various drives smoothly.
Shared Folders
Create shared folders for file access over the network:
-
Folder Management: Define the name, path, and physical storage location.
-
Permissions: Set specific read/write/execute permissions for users or groups.
User Management
Manage user accounts and permissions seamlessly:
-
Creating Users and Groups: Add new users with specific access rights and assign them to groups.
-
Permissions Setting: Control user access to files and folders, enhancing security.
Services
Openmediavault supports a variety of services, allowing versatile configurations:
-
SMB/CIFS: Share files with Windows systems seamlessly.
-
NFS: Optimize Linux file sharing with Network File System support.
-
FTP: Offer file transfers using File Transfer Protocol.
-
WebDAV: Enable remote file access for web-based applications.
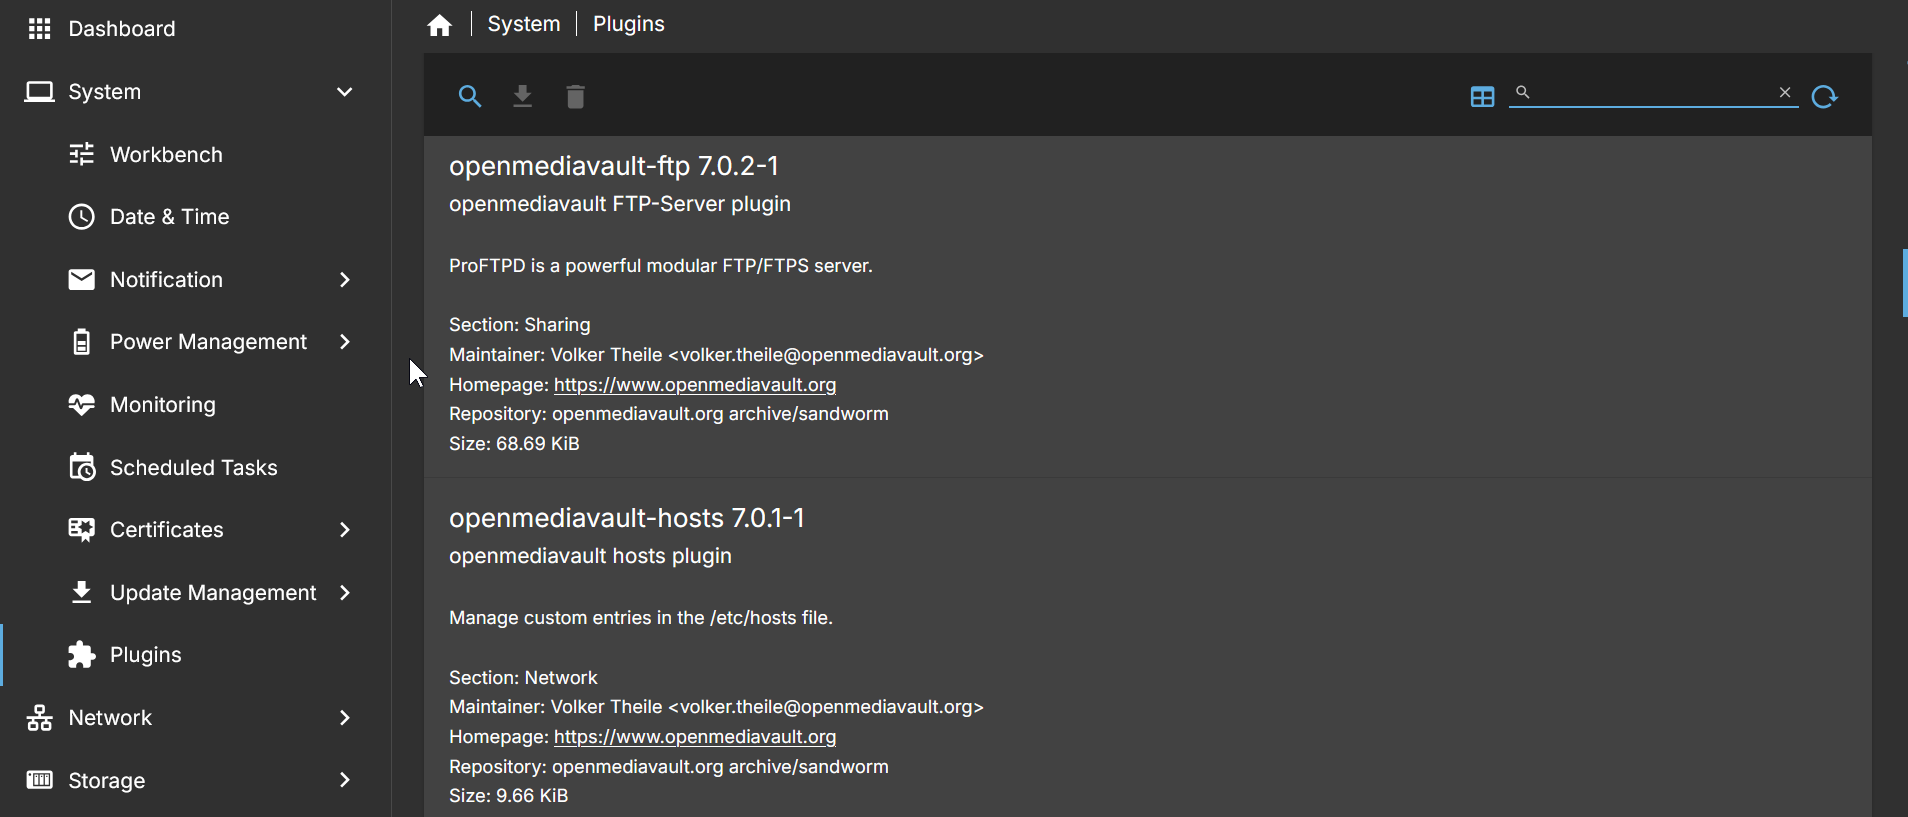
Plugins
Extend Openmediavault's functionality with plugins:
-
Docker: Utilize containerized applications for streamlined app deployment and resource management.
-
Nextcloud: Set up a personal cloud solution for file synchronization and sharing.
-
Virtual Machine Support: Use KVM to create and manage virtual machines directly on your NAS.
Backup
A built-in backup feature allows you to schedule regular backups of your configurations and shared folders, ensuring data safety:
-
Backup Types Available: Create complete backups of entire systems or specific directories.
-
Scheduling: Automate backup processes with cron jobs.
System Logs
Monitor the system through logs for efficient troubleshooting:
-
Real-time Logs: Track system activities, including errors and warnings.
-
Log Management: Access detailed logs for specific services to help diagnose problems.
Network Monitoring
Utilize network monitoring tools for observability:
-
Active Connections: View currently active connections to the NAS.
-
Bandwidth Usage: Monitor data usage for different clients on your network.
Notifications
Stay up-to-date with system alerts and notifications:
-
Email Alerts: Configure email settings to receive notifications about system status and critical events.
-
Message Notification: Get instant notifications for issues that require immediate attention.
Openmediavault offers a powerful, cost-effective solution for anyone looking to build their own NAS. By following these steps, you can set your system up with minimal investment and enjoy the convenience and functionality it offers.